There is extensive documentation online for managing Google Groups – this section is mainly to talk about things specific to how East Kingdom email functions. Please make sure you read through this entire section before using your new Mailing List.
Please note: when we talk about “defaults” for new Mailing Lists, these defaults are only applied on List creation in FusionDirectory. Moving forward, those settings will be up to the List Owner to manage properly to meet the needs of their List.
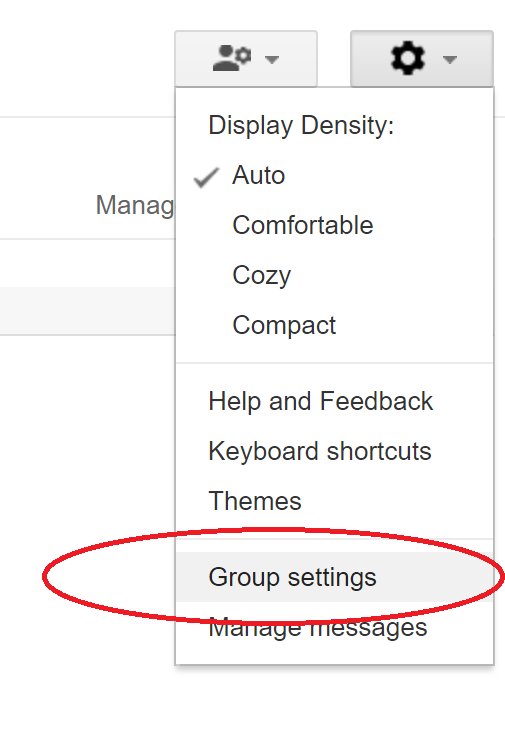
To change any of the settings below, please log in with your East Kingdom “member” account at https://groups.google.com. Then go to your group (which you can find using the prominent “Browse All” button). Once you are viewing the group, click the gear icon near the top-right of your screen, followed by the “Group Settings” link.
Once you have opened up the Group Settings page, you will see a lot of options on the far-left menu. We’ll be referring to these options in each of the settings descriptions below, but will not be following the order they are presented it. Rather than providing a screenshot for each menu item, here is an example section of the menu.
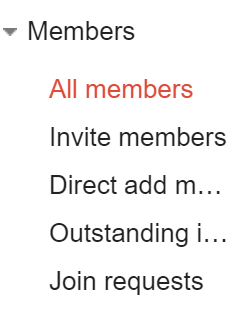
The rest of this document will refer to this menu with a standard convention of the menu section, followed by the menu item. If we wanted to reference the way you can invite new group members, we would say “navigate to Members->Invite members”.
Remember that if you have any questions, you can always reach out to the East Kingdom Webministry for guidance or assistance.
Posting
Controlling who can post to your List is one of the single most important decisions for a group. There are basically three types of lists that we’ve seen: discussion lists, announcement lists, and general inquiry list. Before we get into how to change the specific settings, let’s flesh out those three types a little more.
A discussion list is where the members of the list can discuss various topics back and forth with each other. These messages are usually unmoderated to allow for open discussion.
An announcement list usually has many subscribers, but a limited number of people who can actually post to the list. Most other people are moderated.
A general inquiry list often has several people who receive the mail to the list, and the address is posted publicly. Some branches, for example, have an officers@ list where anyone can contact them with questions.
As you construct your list settings, you’ll need to decide how you want your list to function – Google groups are extremely flexible.
Who Can Send Email To The Group
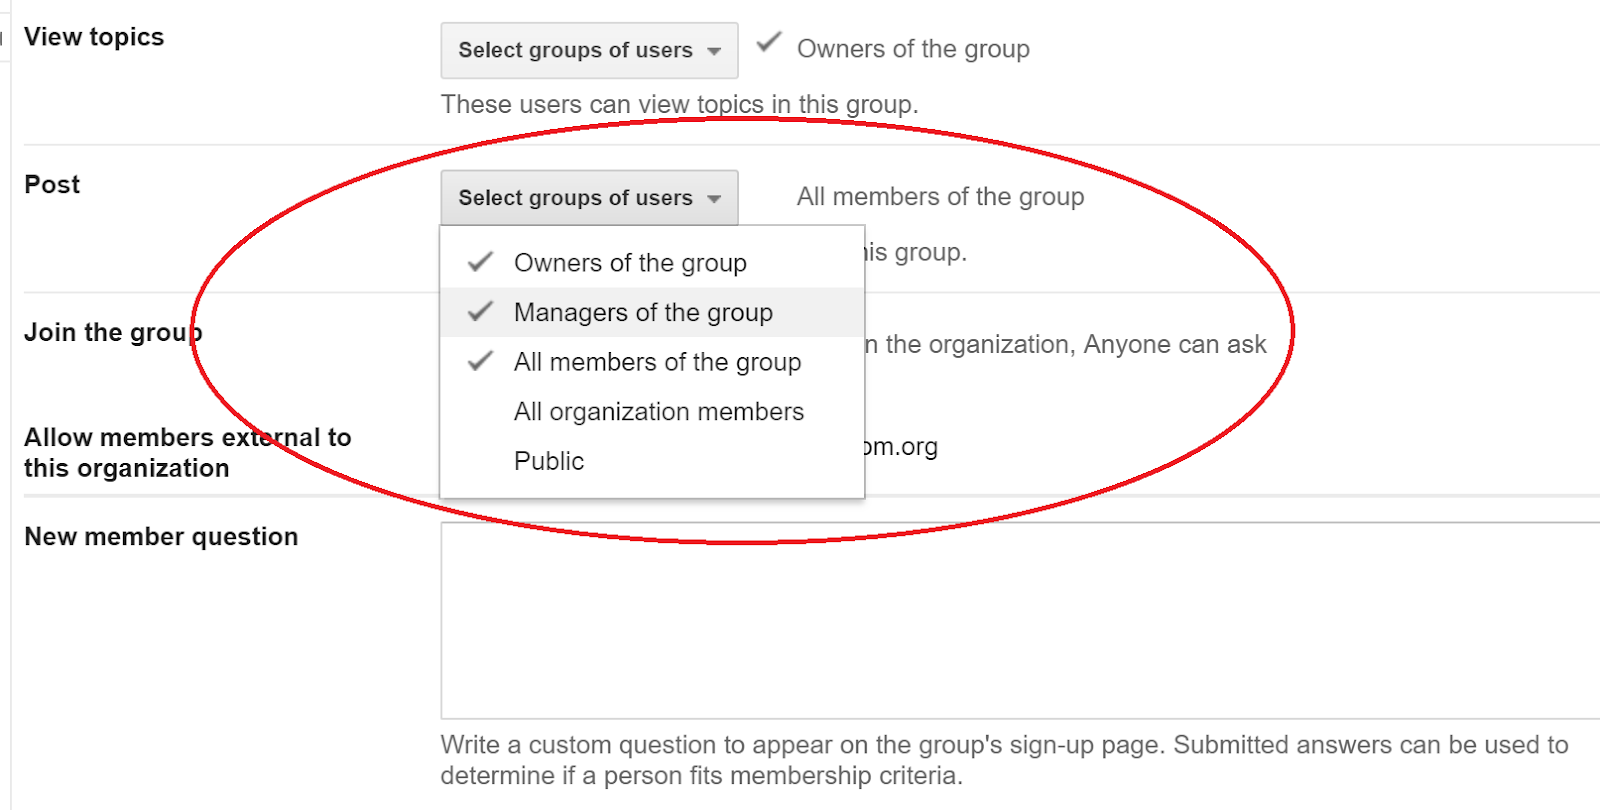
This is controlled with the “Post” setting in the “Permissions->Basic permissions” menu. For a discussion list, you probably want to disallow All organization members and members of the Public from posting to it. For an announcement list, you might want to restrict it down to just Owners or Managers. General inquiry lists could be set to Public. It all depends on what need this List is filling. The screenshot shows an example for a discussion list.
If you set this setting to anything other than Public, all people who are not allowed to send to the list will have their email dropped. This is a departure from other software (like Mailman), where those messages are usually moderated instead.
If you want your List to moderate email from non-members, set the Post permission to “Public”, save your change, then navigate to “Settings->Moderation”. In the first section, “Moderate messages”, check the “Moderate messages from non-members of the group.” box, as shown below.

Auto Replies
You can set automatic replies to people who post to your List by navigating to “Settings->Email options” and looking for the “Auto Replies” section. If you’re moderating messages, as detailed elsewhere, this is a good place to explain non-members what happened to their email.
Moderation
See the Advanced Settings section at the end of this document for more granular control over who can send email to your List.
Email Formatting
In the “Settings->Email options” section, there are several options you might be interested in changing.
Subject Prefix
Much like mailman, you can set a prefix for all emails for your group.

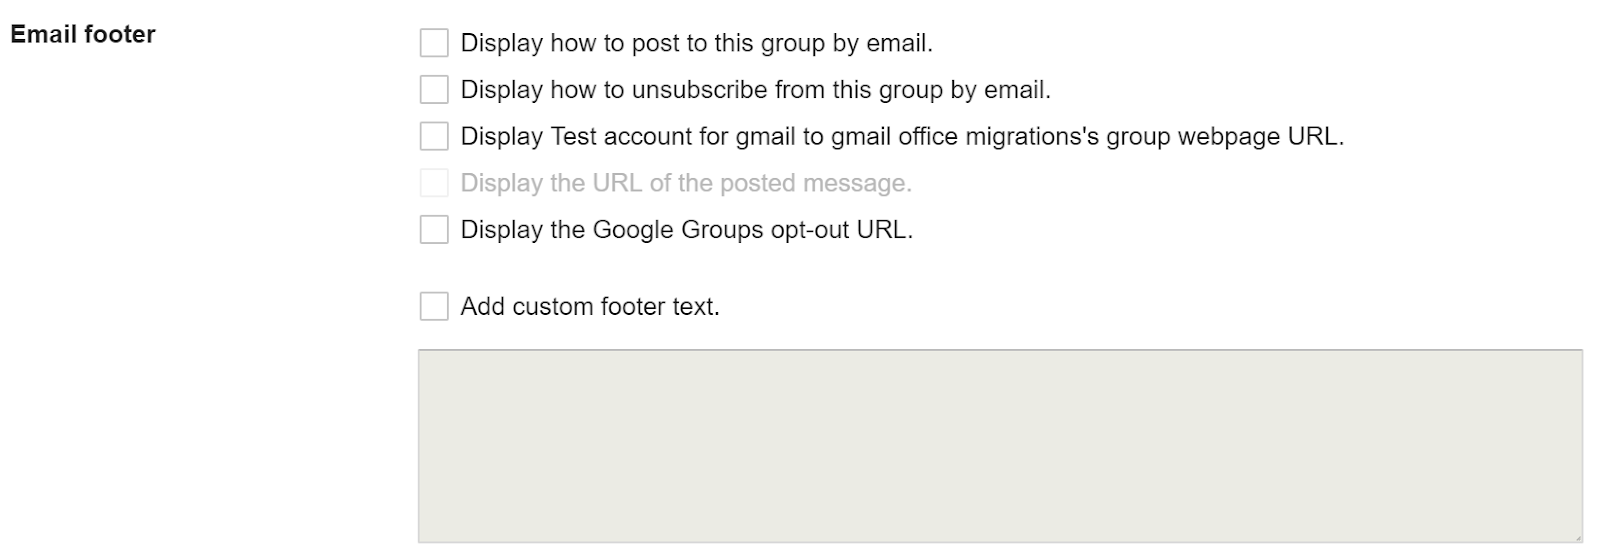
Email Footer
Directly below that, you can configure the footer for all emails coming from your Mailing List. Selecting any of the checkboxes will show the text that will be included.
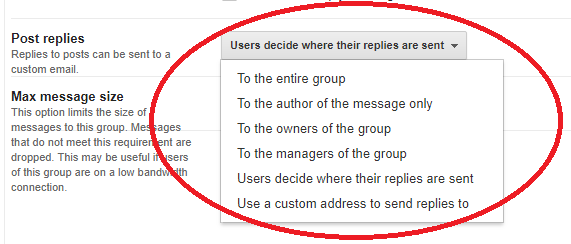
Replies
By default, someone replying to a list email will be able to choose where there reply is sent. To change that setting, alter “Post replies” on the Basic permissions page.
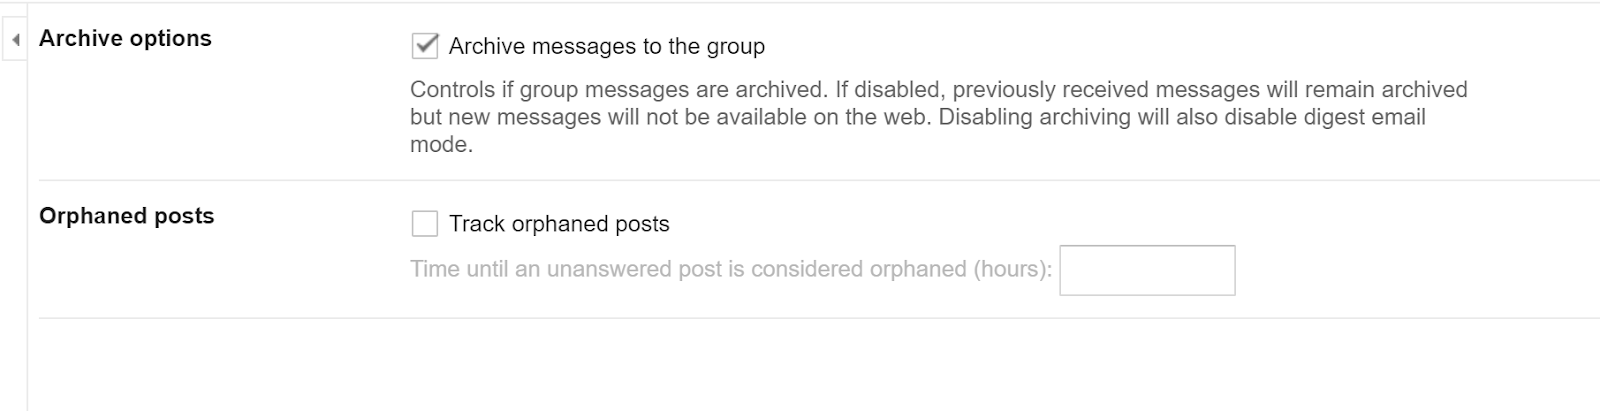
Archiving
By default, new Mailing Lists will not archive email. We are expecting the List Owners turn this setting on if they need to. Turning archiving on is controlled in “Information->Content control” section. Simply click the checkbox to turn archiving on, or uncheck it to turn off archiving of future messages.
 Notes about Archives
- Turning off archiving does not delete old archives. If you find that a group has been archiving inadvertently, after turning off the archiving you should delete all of the messages in the group.
- For “digest” mails, archiving is a strict requirement in Google Groups. We have no control over that. If you have a Mailing List that requires both Archiving and digest emails, please contact help@helpdesk.eastkingdom.org so we can discuss options – addressing that case is beyond the scope of this document.
- By default, archive emails for a group are public, meaning they can be viewed by anyone on the internet. To change that setting, see the next sub-section.
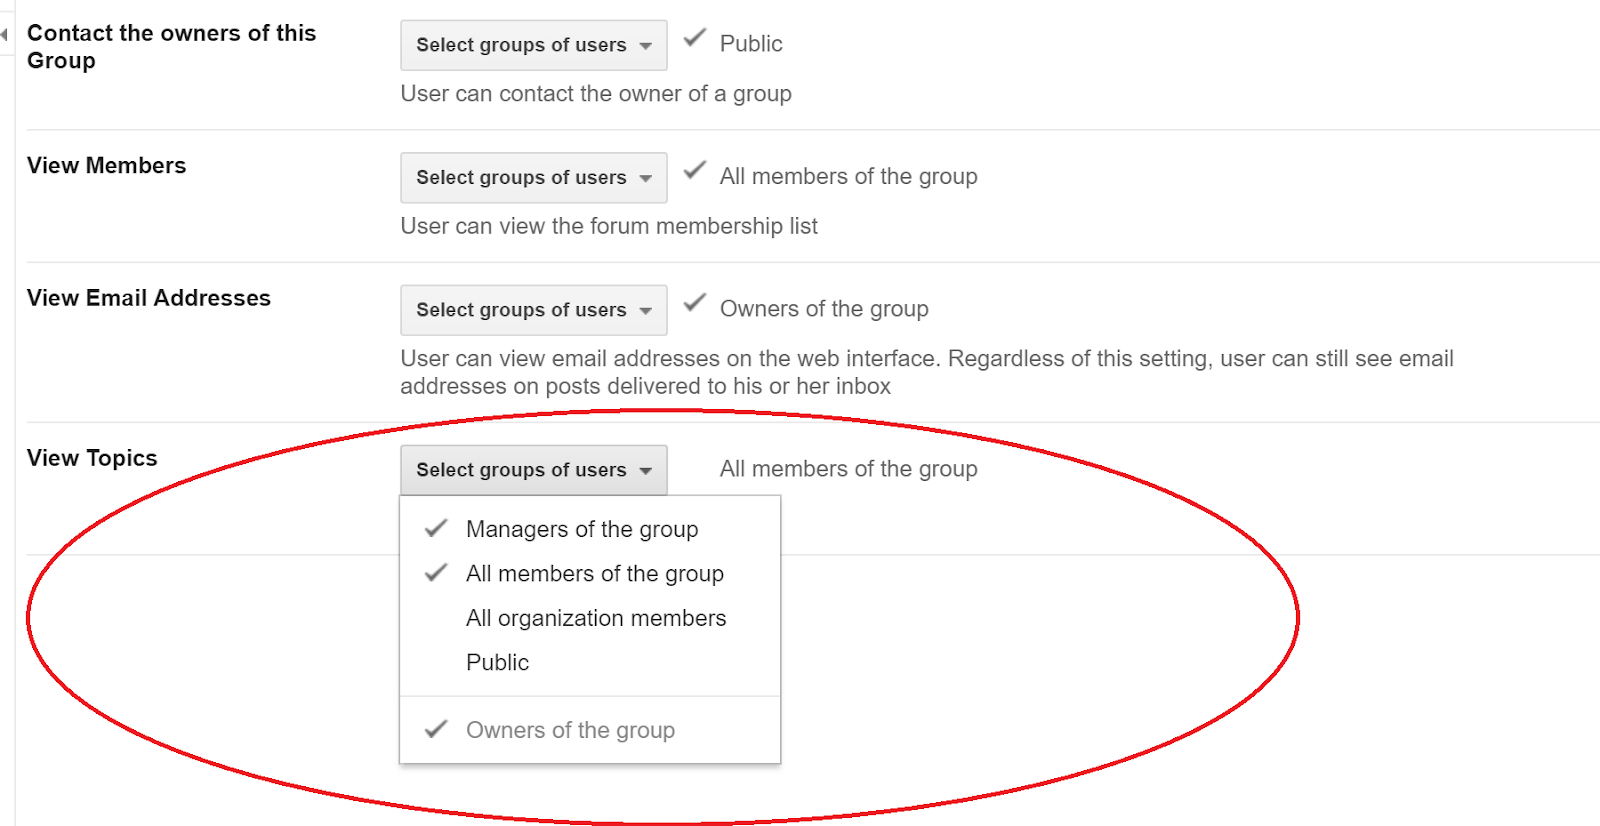
Changing Archive Visibility
Archive visibility is controlled with a setting called “View Topics”, which can be found in the “Permissions->Access permissions” section (this setting is also available under the “Basic permissions” menu). To alter who can view your groups archives, go to that section and select the appropriate user types. Owners of the group can always see its archives.
Joining Your Mailing List
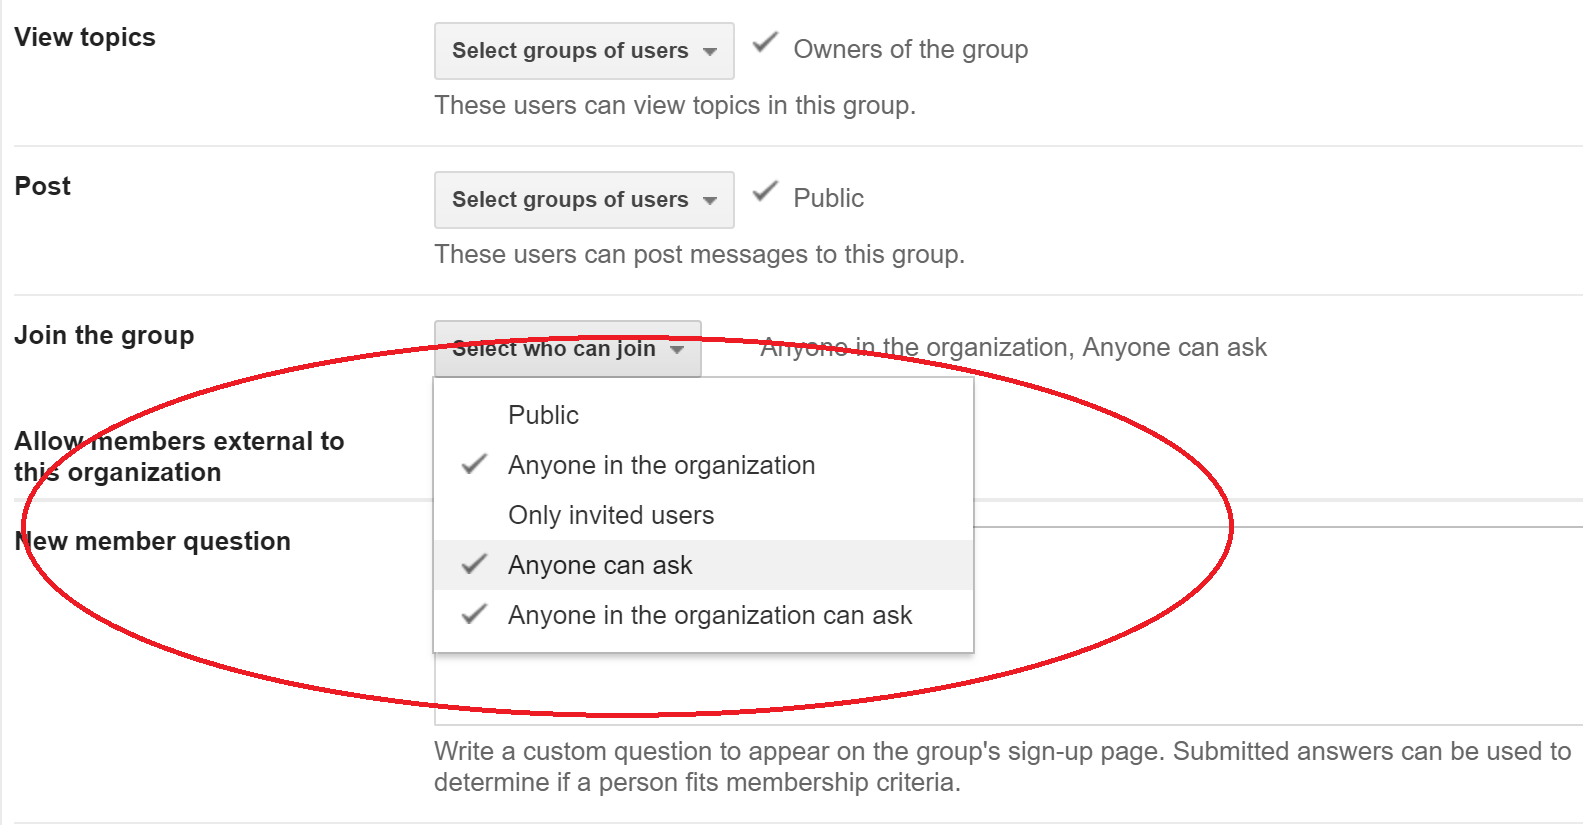
By default, anyone in the world with a Google account can request to join your Mailing List. If you want to allow anyone to sign up (without requiring approval), or want a more restrictive list, navigate to “Permissions->Basic permissions”.
Public means anyone can join without permission. Anyone in the organization means anyone with an East Kingdom account can join without permission. Only invited users means that the List Owner must invite all members to the group themselves. Anyone can ask allows the general public to request membership, while Anyone in the organization can ask means that East Kingdom members can request membership.
These settings can be combined. For example, if you have an announcement list for your branch, and would like all EK members to be able to join without the hassle of explicit approval, but want members of the general public to require approval, you can use the settings in the screenshot below.
Remember to set your archiving and View Topics permissions to line up with your intent for the List. If you have a limited list of people who can join your list, allowing the archive to be public may not be the best idea.
Advanced Settings
The topics above cover most of the settings you’ll need to know. Below we will maintain a list of some more advanced settings that might be helpful to further customize your List.
Moderation
If you have a List that you’d like to manage more granularly, you can also use the moderation settings. For example, let’s say you want an announcement-style list, but don’t want to set every approved sender as list owner or manager. To do so:
Step 1) Set the “Post” permission of the group to “All members of the group”.
Step 2) Under “Settings->Moderation”, find the “New member restrictions” option and set it to either “New member posts are moderated” or “New members cannot post”.
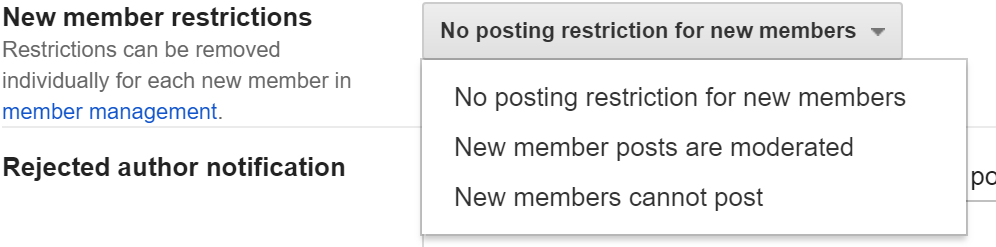
If set to “New member posts are moderated”, all posts from people not approved to send will go to the moderation queue (found under “Messages->Pending messages”). If set to “New members cannot post”, email from unapproved senders will be immediately reject.
Step 3) (Optional) If desired, enter a message sent to the authors of rejected emails and check the checkbox in the “Rejected author notification” section. This will inform senders why their email was not accepted to the list.
Step 4) If this group already has members, click the “member management” link in the screenshot above (this will take you to the same place that “Members->All members” does. If this is a new group without members yet, you can stop here.
Step 5) On the member management page, click the checkbox at the top left to select all members. When the “Actions” button at the top becomes usable, click “Set posting permission”, then ‘Override’ to match whatever option you selected for New members in Step 2.
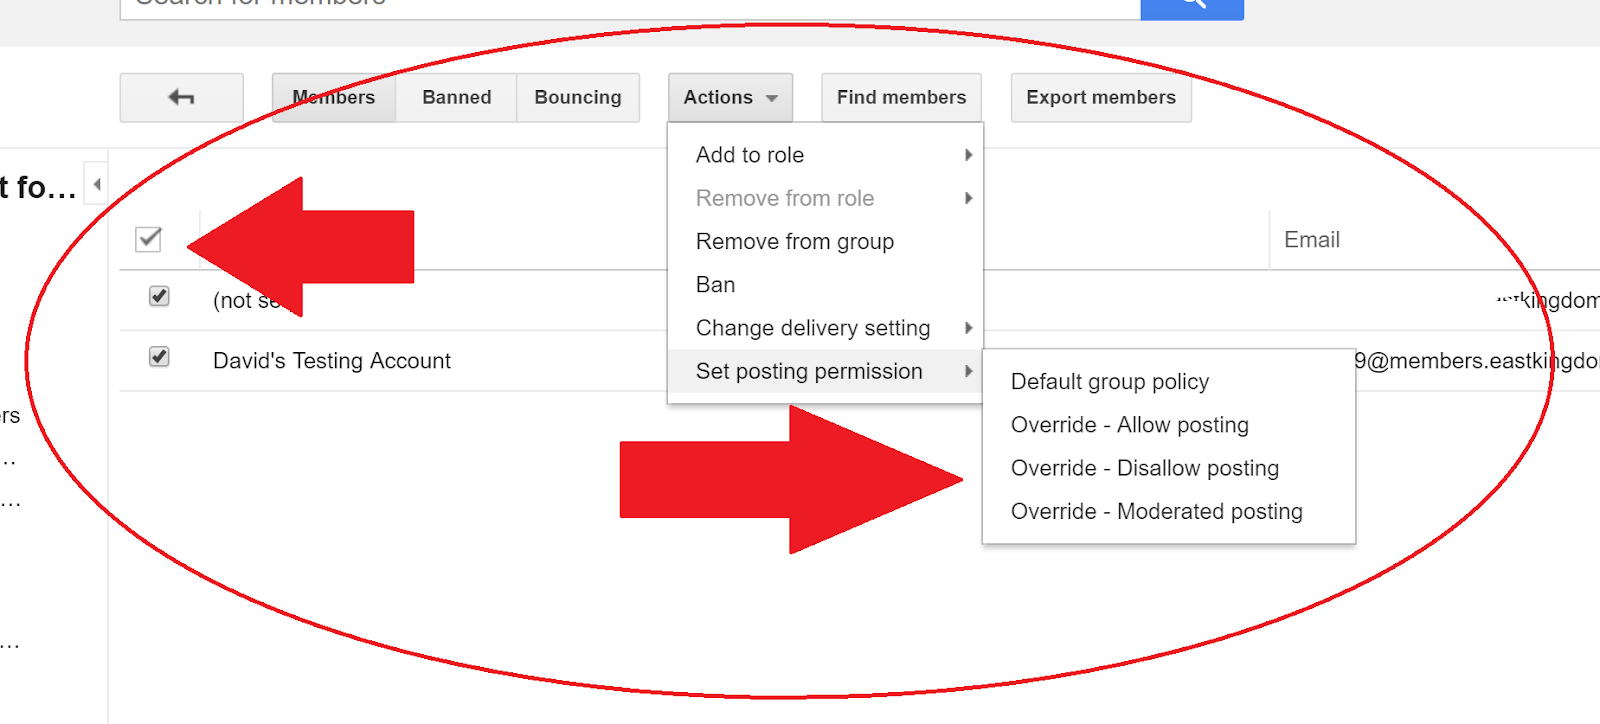
Step 6) Find the members you want to allow to send, and click the checkbox next to the name of each of those individuals.
Step 7) Go back to the “Actions” button and select “Set posting permissions” then “Default group policy”. Since our default policy (set in Step 1) is to allow all members to send to the group, this will allow these individuals to send to the List without any restrictions.
Managing Managers
A group manager can do everything an owner can do, except make another member an owner or delete the group. A group can have multiple managers.
Note: A Google Group cannot be the manager of another Google Group.
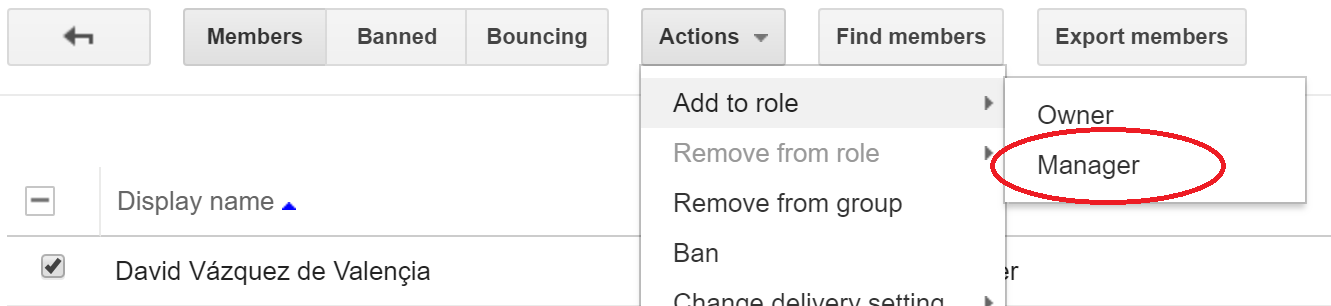
To make someone a Manager of your Google Group, navigate to “Members->All Members” and find the person (or people) you want to give Manager privilege to, then click the checkbox next to their name.
Using the Actions menu at the top, select Add to role, then Manager.